Help Center
Everything you need to know about pricing your handmade crafts.
Pricing Strategy & Tips
Step 1: Common Pricing Mistakes to Avoid
Pricing is one of the trickiest parts of running a handmade business. It's tempting to pick numbers quickly just to make sales — but small mistakes can lead to big losses. By spotting common pitfalls early, you can avoid undervaluing your work and set yourself up for profit from the very beginning.
Mistake 1: Guessing a Price That "Feels Right"
Many new makers simply pick a number that sounds fair, or ask friends and family what they'd pay. While well-intentioned, this approach ignores your actual costs. What feels "fair" doesn't always cover materials, time, or overhead — meaning you could be losing money on every sale.
Tip: Always calculate your costs before setting a price. Gut feelings are great for creativity, but not for business math.
Mistake 2: Thinking Like the Customer You Are
A common trap is asking yourself, "Would I pay this much?" The problem: you are not your customer. You know the behind-the-scenes process, you might undervalue it, or your budget may not match your buyer's. Plenty of artists couldn't afford their own work — and that's okay.
Tip: Instead of pricing for your own wallet, price for your ideal customer — the one who values craftsmanship, story, and uniqueness.
Mistake 3: Undercutting Competitors
It can be tempting to look at established sellers and charge less to "win" buyers. But you don't know their processes, costs, or scale. They may get bulk discounts on materials or streamline production in ways you can't. Copying their prices (or going lower) might mean selling at a loss.
Tip: Use competitor research for inspiration, not imitation. Focus on your own costs and value.
Mistake 4: Accepting Losses as "Normal" at the Start
Some makers assume it's okay to lose money in the beginning and "make it up later." But unless you have investors willing to fund years of losses, this is risky. Consistently pricing too low makes it hard to raise prices later and can burn you out.
Tip: Aim for profit from your very first sale. Even small profits show your business can be sustainable.
Takeaway: Your pricing is the foundation of your handmade business. By avoiding these four common mistakes, you give yourself the best chance to succeed.
Step 2: How to Calculate Your Production Cost
Before you can price with confidence, you need to know what it really costs to make your product. Too many makers skip this step and end up guessing, which almost always means underpricing.
What Goes Into Production Cost?
- Materials
- Shipping & Taxes on Materials
- Labor
- Packaging
The Formula
Materials + Labor + Packaging = Base Cost
Tips for Making It Easier
- Keep a running list of materials
- Track costs as you go
- Break big purchases into per-item costs
- Update costs regularly
Takeaway: Your production cost is your safety net. Once you know it, you'll never wonder if you're undercharging.
Step 3: Don't Forget Your Labor!
Many makers happily calculate the cost of materials but forget the most important piece — their time.
Why Labor Matters
- Making by hand takes time — that's part of the cost
- If you don't add labor, you can't grow or hire help later
- Labor makes your price reflect your true effort
How to Calculate It
- Decide on an hourly rate
- Track how long it takes to make one product
- Multiply time × hourly rate = your labor cost
Common Excuses Makers Use
- "I'd be making it anyway."
- "I enjoy it, so it doesn't count."
- "Customers won't pay if I add labor."
These are traps. Enjoying your craft doesn't mean your time is free.
Takeaway: If you wouldn't work for free at someone else's job, don't work for free in your own business. Your labor deserves respect — and pay.
Step 4: Using Markups to Set Your Price
Knowing your base cost is only half the equation. To turn costs into real profit, you need a markup. Markups help ensure you're covering expenses while still earning enough to grow.
The Formula
Cost + (Cost × Markup) = Price
Example: If your base cost is $29 and you choose a 150% markup, your selling price is $72.50.
Choosing the Right Markup
- 100% markup = doubling your cost
- 150% markup = adding 1.5× cost on top
- Markups vary but should cover hidden costs and growth
Why Markups Work
- Simple and repeatable
- Scales with your costs
- Keeps your pricing consistent
Takeaway: Markups protect you from underpricing. Once you know your costs, applying a markup gives you a fair, profitable selling price every time.
Step 5: Margin vs. Profit (Know the Difference)
Markup and margin get mixed up a lot. They sound similar but measure different things. Understanding the difference helps you set prices that actually grow your business.
Markup = What You Add On
Markup is how much you increase your cost to get to the selling price.
Margin = Profit Percentage
Margin looks at profit as a percentage of the selling price.
Why It Matters
- Markup helps you set prices
- Margin shows how much you're really keeping
- Knowing both helps with decisions like wholesale and discounts
Takeaway: Don't confuse markup with margin. Use markup to set your prices, and margin to measure your success.
Step 6: The Psychology of Pricing
Sometimes it's not just about the number, but how that number feels. Pricing psychology is about small tweaks that influence buying decisions.
Charm Pricing (Odd Numbers & 9s)
- $11.99 feels closer to $11 than $12
- Can increase sales by up to 25%
Prestige Pricing
Round numbers (like $70) signal luxury
Bracketing & Anchoring
- Offer 3 versions: basic, regular, premium
- Most buyers choose the middle option
Reduce Options
- Too many choices overwhelm
- Limit variations to guide buyers toward confident decisions
Takeaway: The way you present prices can nudge buyers toward saying "yes."
Step 7: Reduce Options for Happier Customers
As makers, we love variety. But for customers, too much choice can be overwhelming. Simplifying your options can actually increase sales.
The Problem with Too Much Choice
- "Choice overload" makes buyers freeze
- Too many options can lead to no decision
- Customers often regret purchases when overwhelmed
The Solution: Simplify
- Limit to your best colors, styles, or patterns
- Guide buyers with clear categories
- Curate instead of offering everything
Takeaway: Simplifying choices helps customers feel confident and happy with their purchase.
Step 8: How Price Formatting Can Boost Sales
The way your price looks can affect how customers feel about it. Small formatting tweaks can make a difference in perception.
Tricks to Try
- Drop the $ sign
- Keep it clean
- Be consistent
Why It Works
Our brains associate the $ sign with money stress. By removing it, customers may focus more on the product's value than on the price tag.
Takeaway: It's not just what you charge, but how you show it. Clean, thoughtful price formatting can make your products feel more approachable.
Step 9: Why Uniqueness Justifies Higher Prices
Your handmade products are not mass-produced — and that's your greatest strength. Uniqueness adds value, and customers expect to pay more for one-of-a-kind items.
The Power of Unique
Rare = valuable
How to Use This in Pricing
- Highlight what makes your item special
- Remind customers that no two pieces are exactly alike
- Price with confidence
Takeaway: Don't compete with factory-made goods. Your originality justifies your price — and often lets you charge more.
Step 10: Final Word — Value Your Work
At the end of the day, pricing is about respect — for your craft, your skills, and your time. Handmade work is special, and your prices should reflect that.
Key Reminders
- Handmade = quality and care
- Competing with Walmart is a losing game
- The right customers value your work
Mindset Shift
Pricing confidently isn't about greed. It's about sustainability. When you price fairly for yourself, you create a business that lasts — and you serve customers who truly value what you do.
Takeaway: You don't need to justify your prices to everyone. The right customers will see the value. Stand firm, value your work, and build a business you're proud of.
About Price Your Craft
What is Price Your Craft?
Price Your Craft is a suite of specialized pricing calculators designed for different craft disciplines. Each calculator is tailored to the specific materials, processes, and business considerations of that craft, helping you price accurately and profitably.
Which craft calculators are available?
Nine calculators, each with its own help section below:
- Candles: A batch of candles priced per candle: wax, fragrance load, jars, wicks and labels
- Clay & ceramics: Clay, glaze and firing by the piece, with a simple mode for typical mugs, bowls, plates and vases
- Crochet & knit: Yarn and stuffing by weight, extras, and your stitching and finishing time
- Embroidery & cross-stitch: Floss from your stitch counts or the design's size, fabric, and framing
- Punch needle: Yarn from the size and loop height, cloth, and finishing
- Quilting & sewing: A quilt's top, backing, batting, binding and long-arm quilting, or anything sewn from its fabric and notions
- Rugs: Hand-tufted rug pricing with materials, labor, and finishing
- Soap: A batch of soap priced per bar: oils, lye, scent, colour and wrapping
- Weaving & macramé: Warp and weft from your sett, or macramé cord from your cords and knotting
Coming next: resin and jewelry. Tell us what you'd like to see through the contact page.
Can I save or export my pricing calculations?
Yes! You can save templates for repeat items, export calculations as PDF invoices for clients, and access advanced reporting features with paid plans. This helps you maintain consistent pricing and professional client communication.
How do I use the calculators?
Watch this quick video tutorial to learn how to use the Price Your Craft calculators effectively:
The video covers calculator basics, how to input your materials and labor, and how to save and export your pricing.
Candles
Open the calculatorHow does it work out a price for each candle?
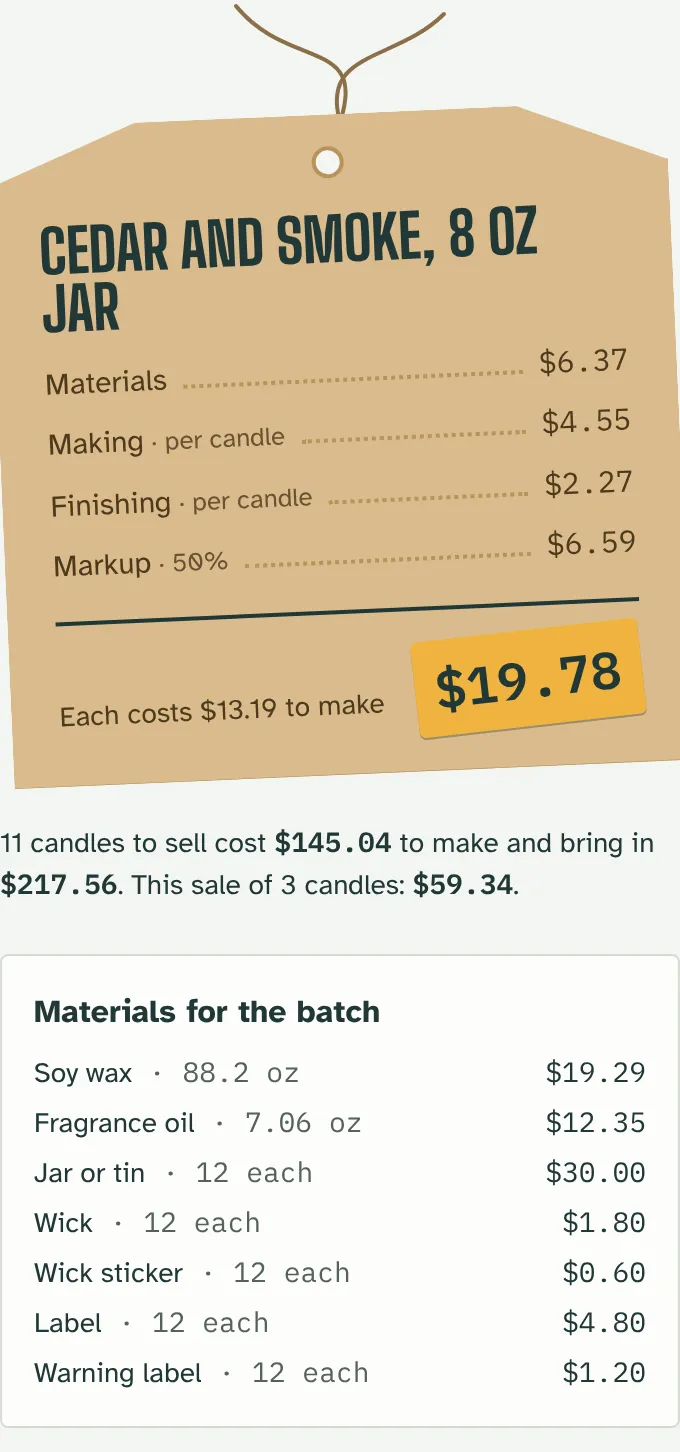
You price a whole batch at once, because that's how candles are made. Tell it how many you poured, the wax, scent, jars and wicks, and your hours for the batch. It adds everything up and shares it across the candles you can sell.
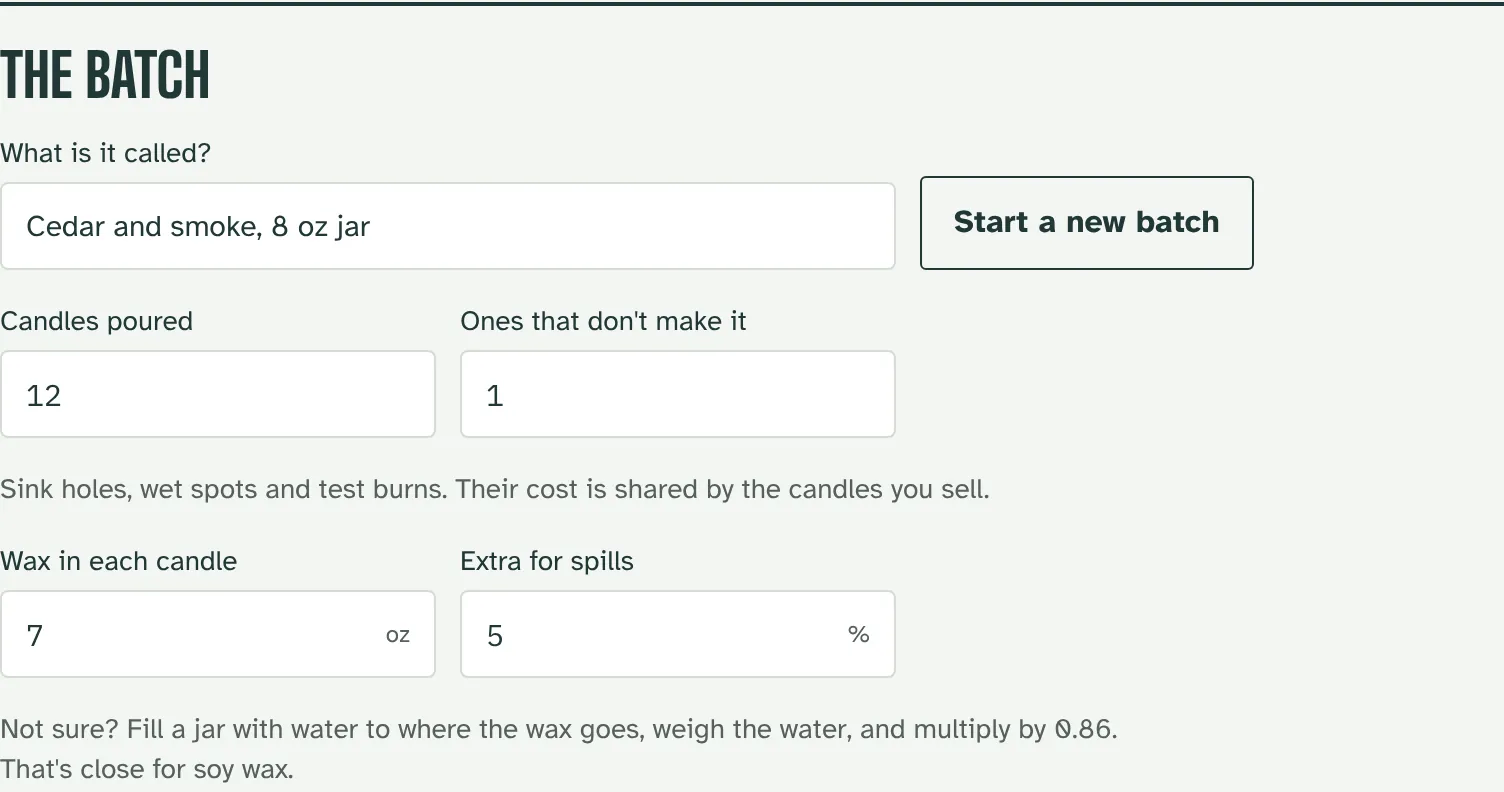
Candles that don't make it (sink holes, wet spots, the one you test burn) still cost you to make, so their cost is shared by the ones you sell.
How much wax goes in each candle?
Fill an empty jar with water to where the wax would come up to, weigh the water, and multiply by 0.86. That's close for soy wax, which is lighter than water. Or weigh one finished candle and take away the empty jar's weight.
The extra for spills covers what's left in the pouring pitcher and the odd drip. 5% is a good start.
What fragrance load should I use?
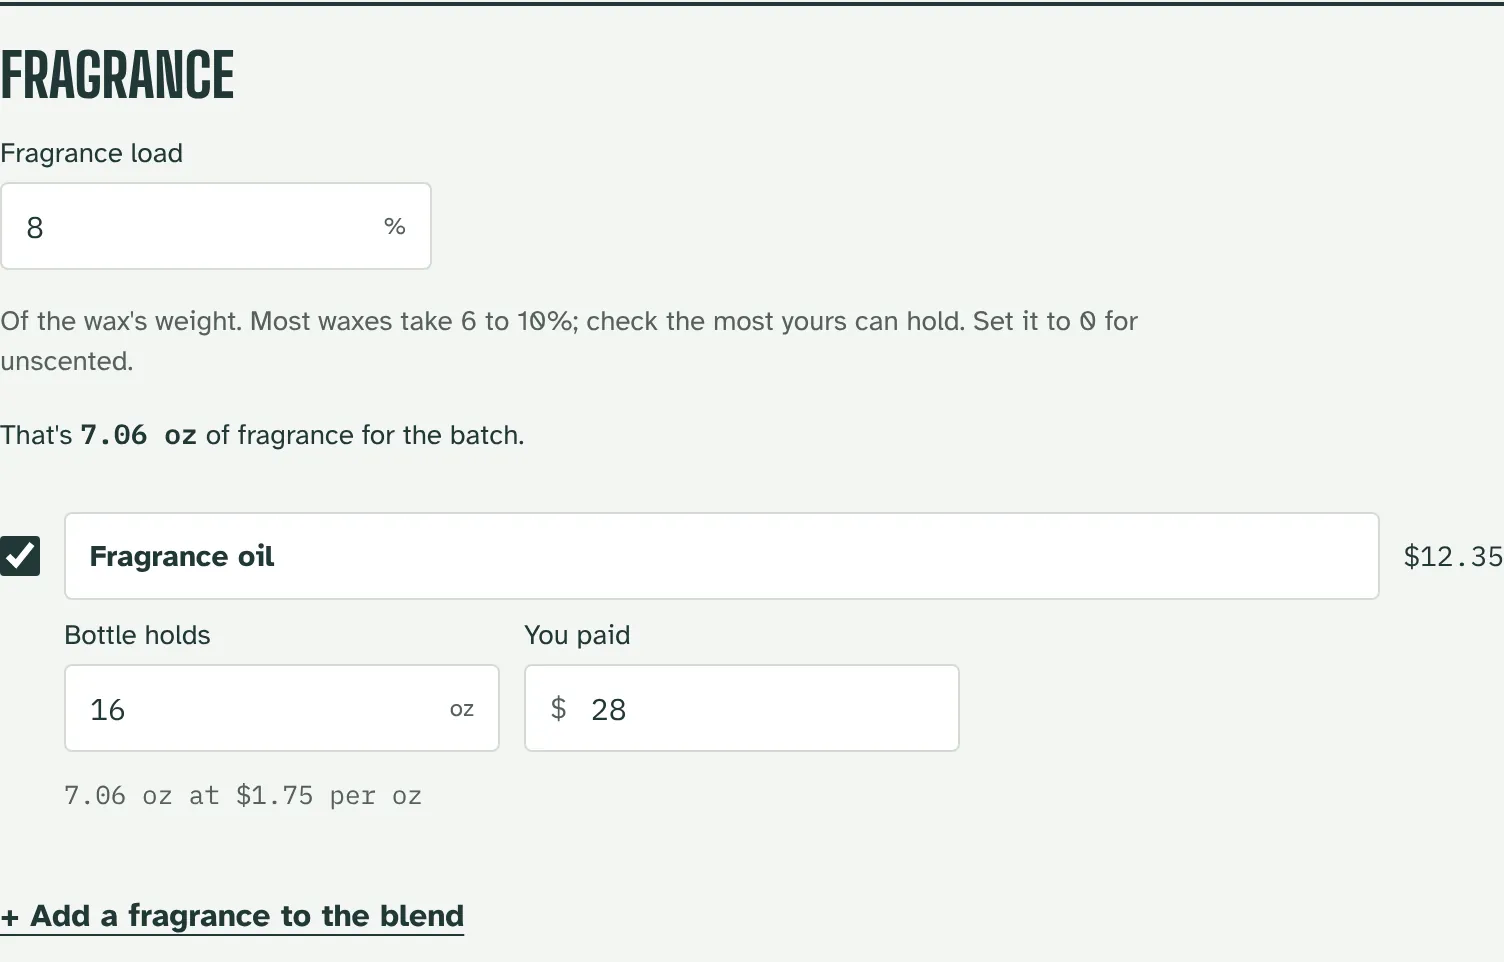
Fragrance load is the fragrance's weight as a percent of the wax's weight. Most waxes hold 6 to 10%; your wax supplier lists the most yours can take. Blending two oils? Add a second fragrance and give each a share of the scent.
How do I price two-wick candles, lids and boxes?
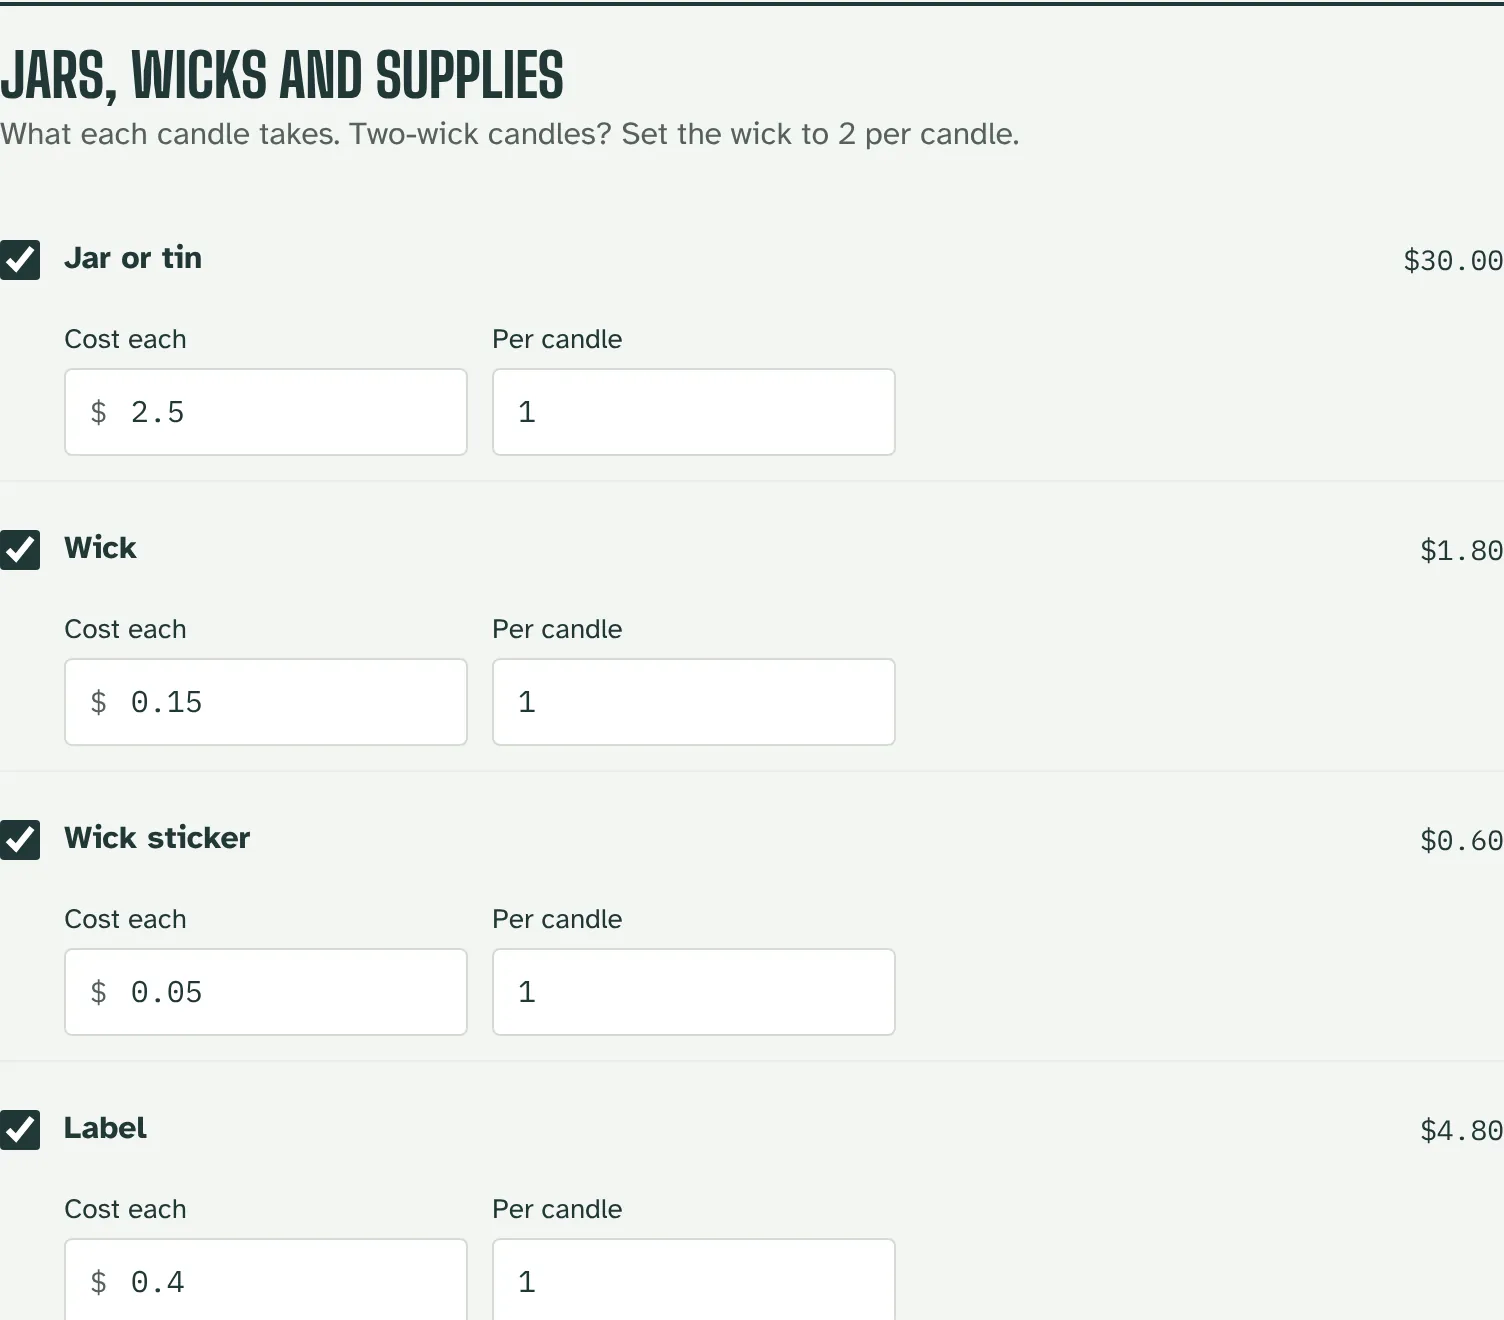
Each supply has a cost each and how many go on one candle. For a two-wick candle, set the wick to 2 per candle. Something you pay once a batch, like a sample of a new scent, can be added as a supply that costs once per batch.
How do I invoice or record a sale of several candles?
Set Candles in this sale under The sale. The invoice and the recorded sale use that many candles at the price per candle, and your sales reports and inventory count just those candles, not the whole batch.
Clay & ceramics
Open the calculatorWhat makes ceramics pricing different?
Ceramics pricing has unique considerations:
- Dual capacity limits: Your time vs. kiln firing capacity
- Firing costs: Bisque and glaze firing expenses per piece
- Material waste: Higher breakage rates during firing (factor 10-15%)
- Clay and glaze weights: Precise material usage per piece
- Multiple firings: Each piece requires 2+ firings
Should I price based on time or kiln capacity?
Use both approaches and compare:
- Time-based: Good for complex, time-intensive pieces
- Kiln-based: Better for production pottery that fills kiln space efficiently
- Use the higher price to ensure profitability regardless of bottleneck
Large bowls might be kiln-limited, while detailed mugs might be time-limited.
How do I calculate firing costs per piece?
The industry-standard method is to charge $0.06 per cubic inch ($0.00366 per cm³). This rate covers:
- Electricity costs during firings
- Kiln maintenance and replacement costs
How to Calculate
- Measure your piece at the greenware stage (before first firing)
- Calculate cubic inches: Length × Width × Height (or cm³ for metric)
- Multiply cubic inches (cm³) by $0.06
Example Calculation
A mug measuring 4″ × 3″ × 5″ (10cm × 7.6cm × 12.7cm) = 60 cubic inches (983 cm³)
60 × $0.06 = $3.60 for both bisque and glaze firing
Important Notes
- This rate typically covers both bisque (cone 04) and glaze (cone 6) firings
- The $0.06 rate represents an average calculated per firing/per kiln over a year
- Factor in kiln space efficiency - large pieces that take up more space cost more
- You can use firing-fee calculators online to determine your own base rate if needed
How do I calculate clay, glaze, and underglaze usage?
Accurately measuring materials helps ensure profitable pricing:
Clay Measurement
- Pre-measure: Weigh your clay before you start working
- Mid-process weighing: Weigh the piece as soon as it becomes easy to pick up and place on a scale
This gives you the exact amount of clay per piece for consistent pricing
Glaze and Underglaze Measurement
- Before and after method: Measure the amount of glaze before application
- After glazing, measure what's left in the container
- The difference tells you exactly how much glaze was used per piece
- Track this for each piece type to build accurate material costs
Crochet & knit
Open the calculatorHow do I work out how much yarn a piece used?
Weigh it. Yardage is hard to count once it's worked up, but weight is easy:
- Finished piece: Weigh the piece without any stuffing, and enter that as the yarn weight
- Before and after: Or weigh your skeins before you start and again when you finish. The difference is what the piece used
- Several yarns: Tick each yarn you used. They share the piece's yarn weight rather than each being charged for all of it
What does my yarn cost per ounce or gram?
Divide what you paid by what the skein weighs. A 3.5 oz (100 g) skein that cost $7 is $2 per oz, or 7¢ per gram. The calculator can work this out for you: enter a purchase's weight and price and it fills in the cost per unit.
How do I price stuffing, safety eyes and other extras?
- Stuffing: Weigh the stuffed piece, take away the yarn weight, and enter the rest as stuffing
- Extras: Add safety eyes, buttons, zips or a gift tag as a custom material with a set cost per piece
How should I count my time?
Time is usually the biggest part of a handmade price, so count all of it:
- Making: Every hour spent crocheting or knitting, including swatching and frogging
- Finishing: Weaving in ends, sewing parts together, blocking, and adding details
- Pay yourself fairly: Pick an hourly rate you'd be happy to earn, not what you think buyers expect
A timer app helps. Time a few pieces of the same pattern and use the average.
Embroidery & cross-stitch
Open the calculatorHow does it work out how much floss I need?
For cross-stitch, it works out the thread in one full cross from your fabric count, then how many crosses a skein covers with the strands you stitch with. On 14-count with two strands that's about 2,200, close to the usual "a skein does about 2,000 stitches".
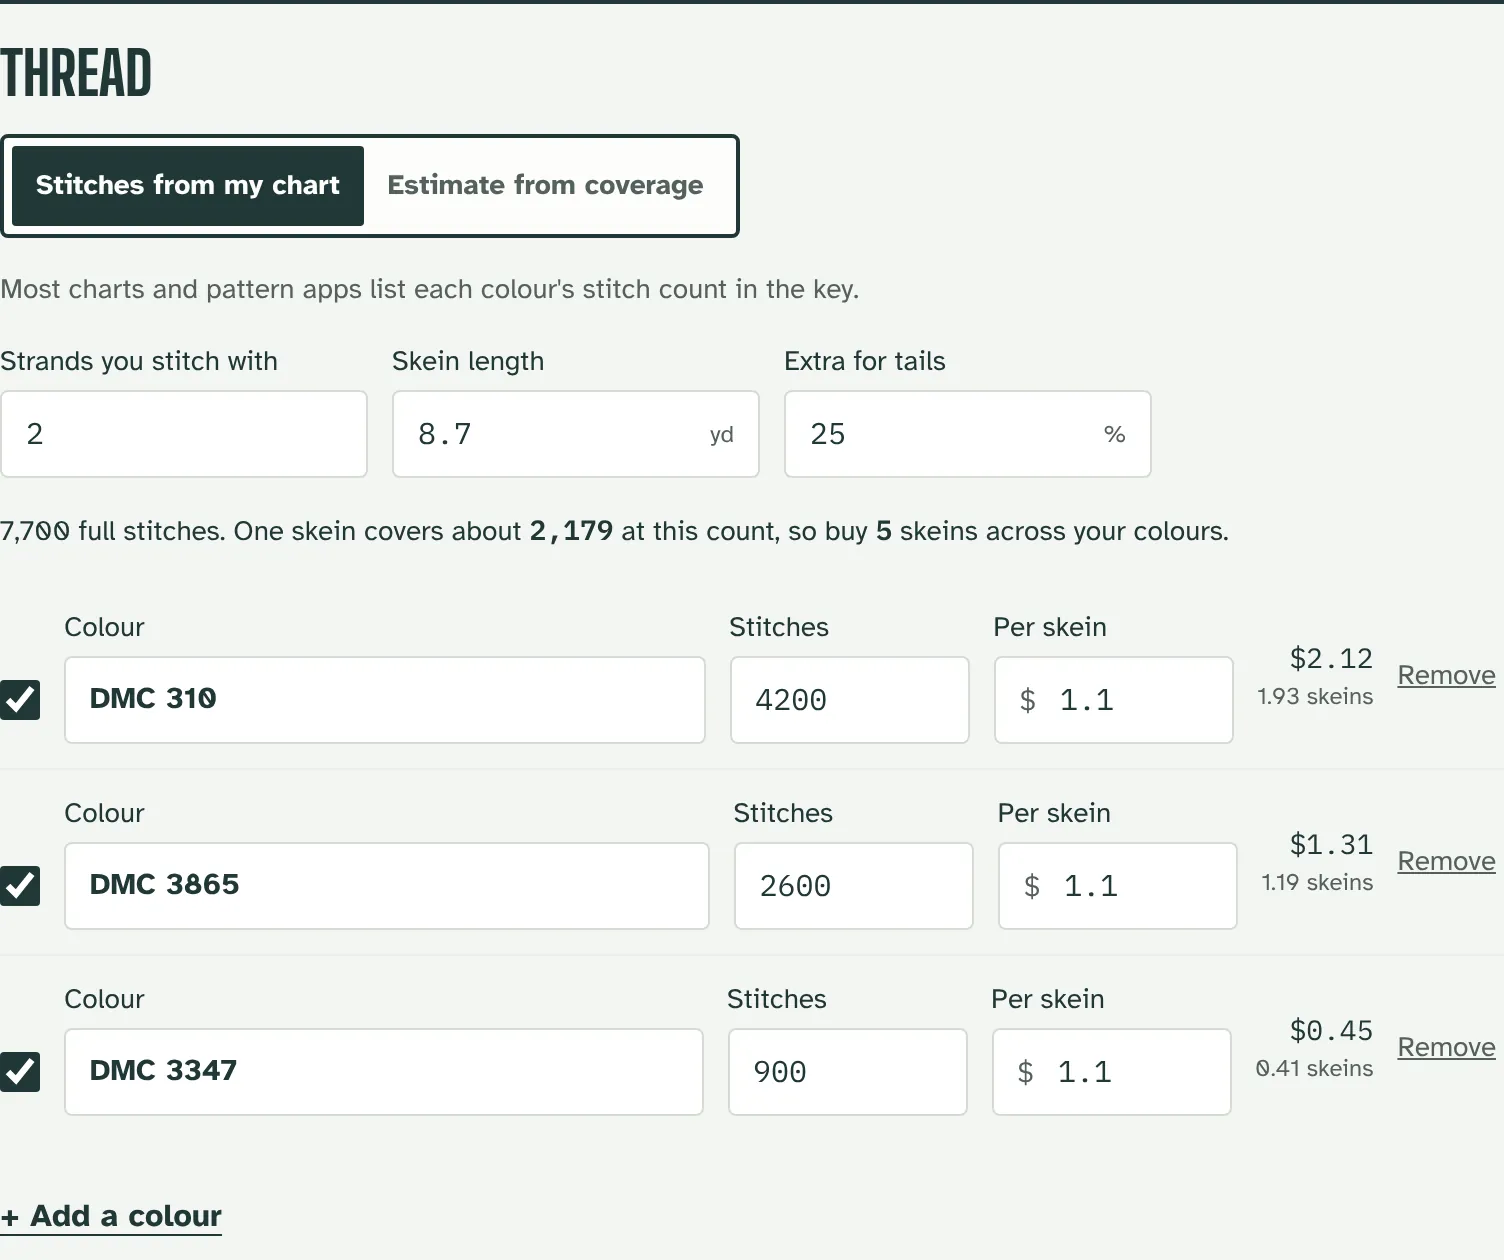
Each colour shows how much of a skein it uses, and the note says how many skeins to buy across all of them.
Where do I find each colour's stitch count?
Most charts list it in the key, and pattern apps show it for each colour. Choose Stitches from my chart and type them in. No counts? Choose Estimate from coverage: give the design's size in stitches and roughly how much of it is stitched.
I stitch on evenweave or linen. What count do I use?
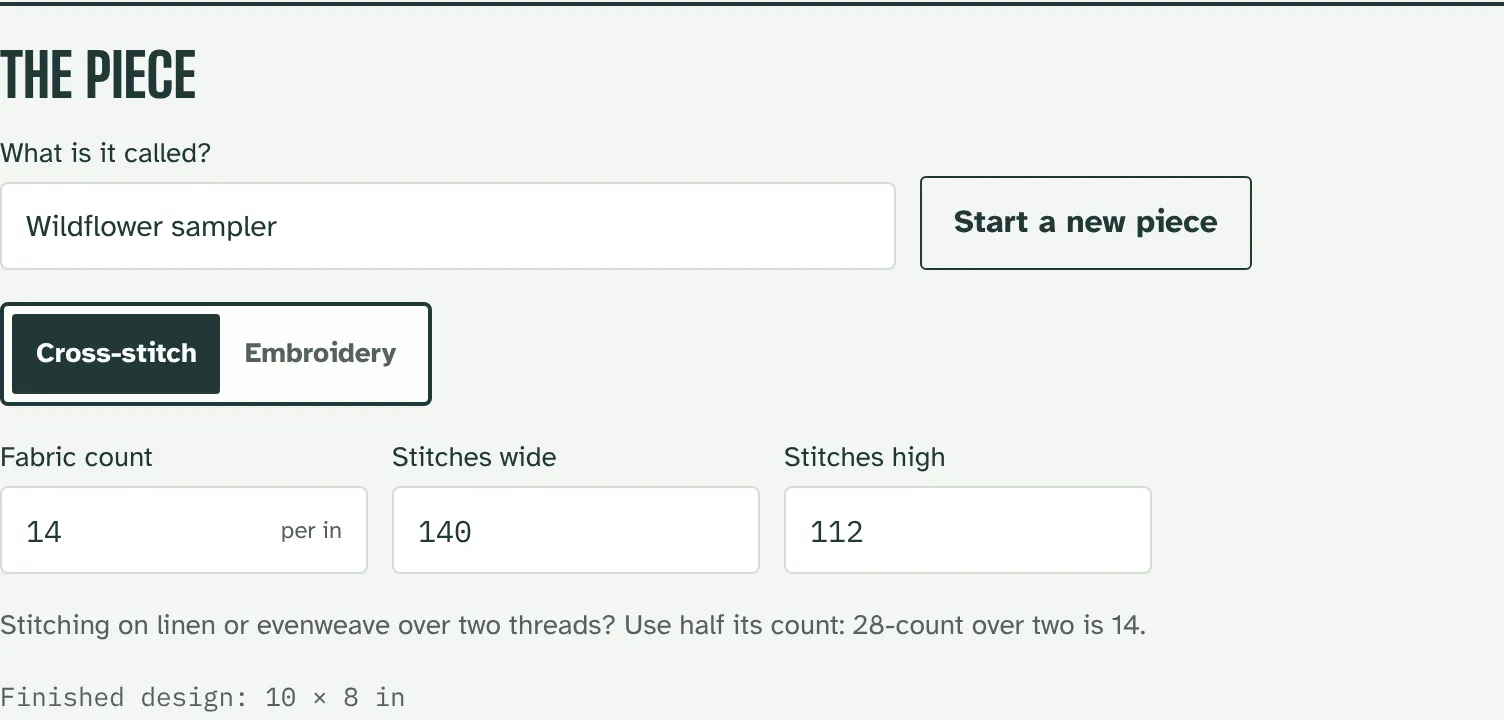
Stitching over two threads, use half the fabric's count: 28-count over two is 14 stitches per inch. The calculator also shows the finished design's size from its stitches, so you can check it fits your frame.
How do I price freehand embroidery?
Choose Embroidery and give each colour the skeins (or part skeins) it uses. A half-used skein is 0.5. Add the fabric, a hoop or frame and any stabilizer, then your hours.
Should framing go in the price?
If the piece is sold framed, yes: tick Frame and mounting board under Finishing and extras and enter what it costs you. Framing is often the biggest material cost on a finished piece, so it's worth getting right.
Punch needle
Open the calculatorHow does it estimate the yarn?
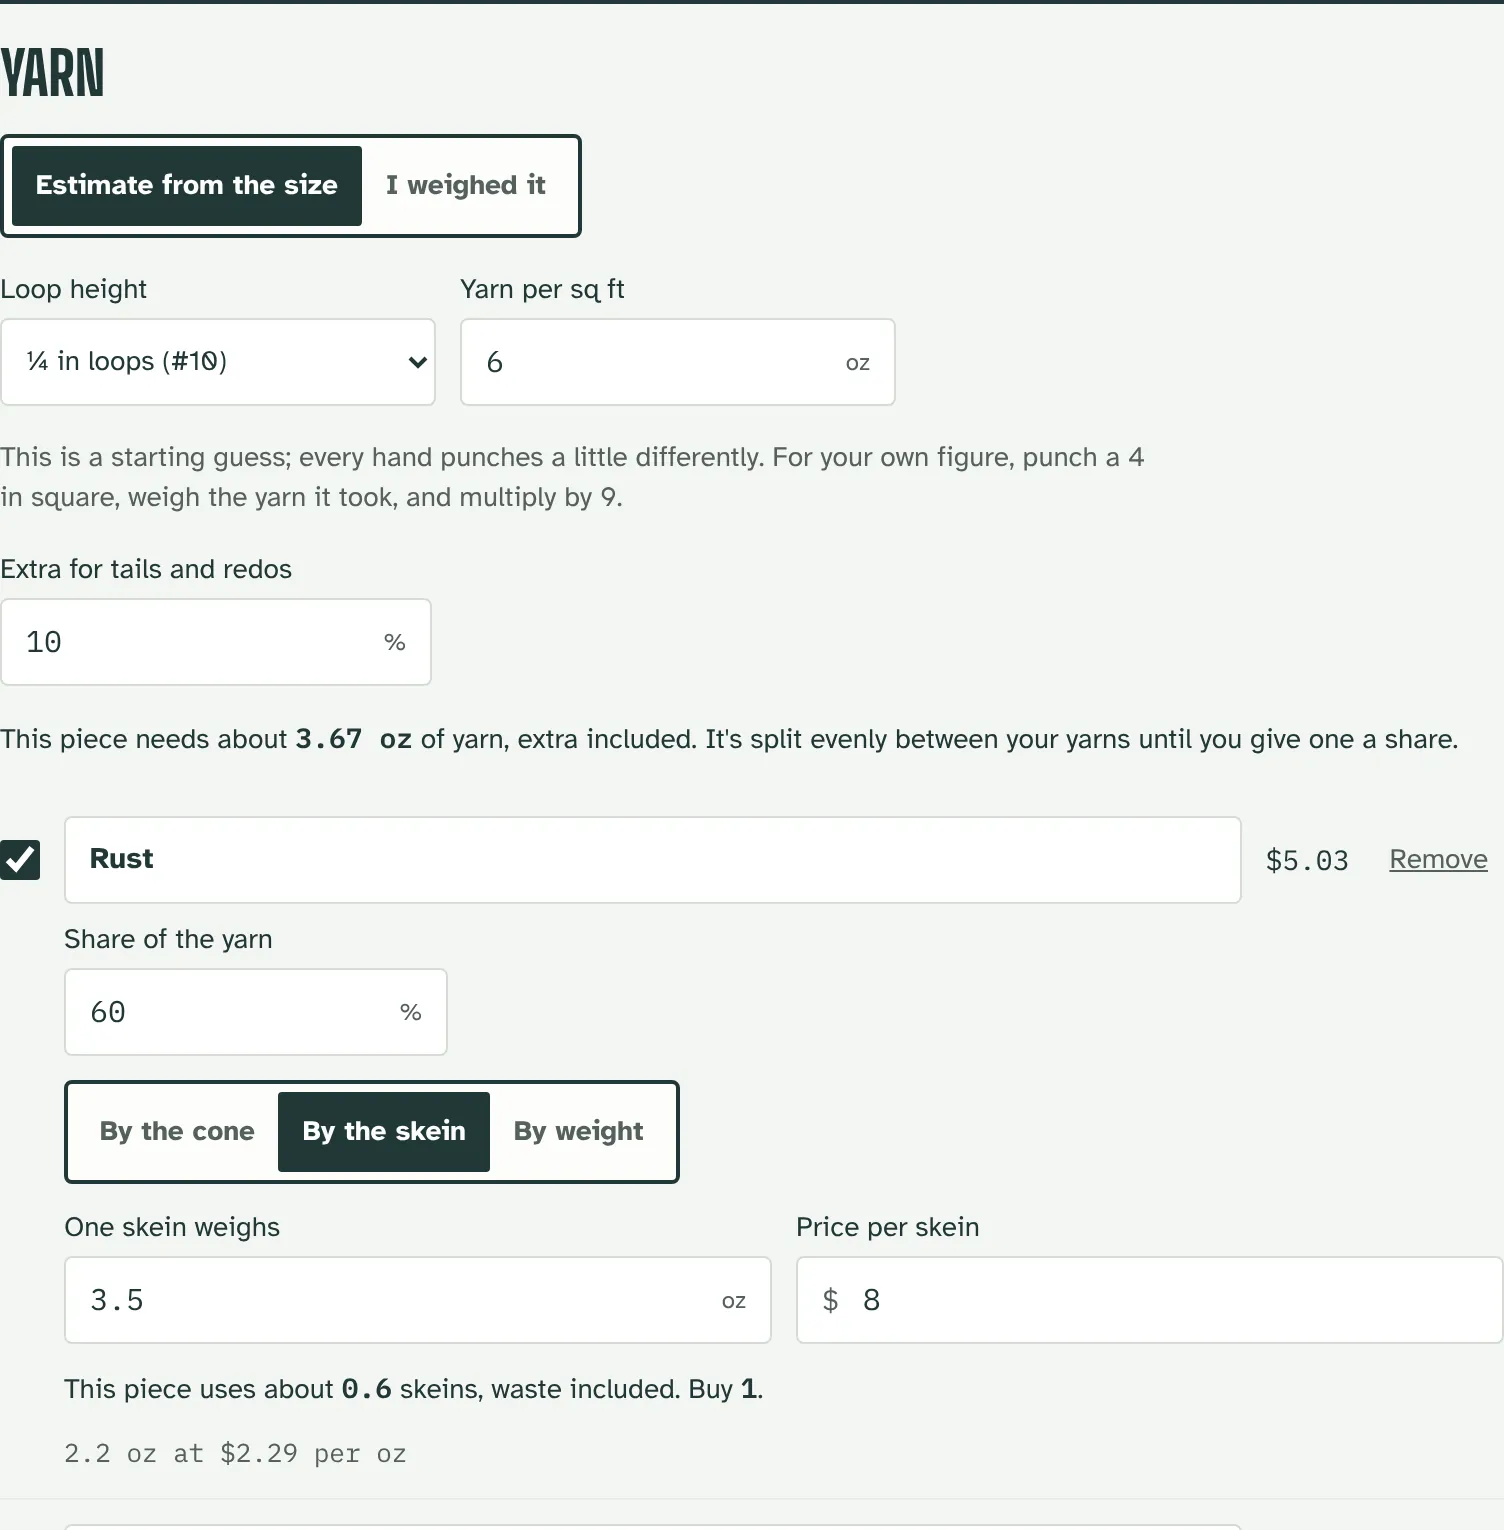
From the punched area and a figure for yarn per square foot. Pick your loop height and it fills in a starting guess, but every hand punches a little differently, so for your own figure: punch a 4 in square, weigh the yarn it took, and multiply by 9 (or a 10 cm square, times 100). Already finished? Choose I weighed it and enter the yarn's weight.
I use several colours. How is the yarn split?
Add a yarn for each colour. They share the piece's yarn evenly until you give one a share, say 60% for the background. Each shows how many skeins to buy.
My piece leaves some cloth showing. What do I do?
Lower How much is punched. A wall hanging with half its cloth showing is 50%, and the yarn follows.
How much cloth does it charge for?
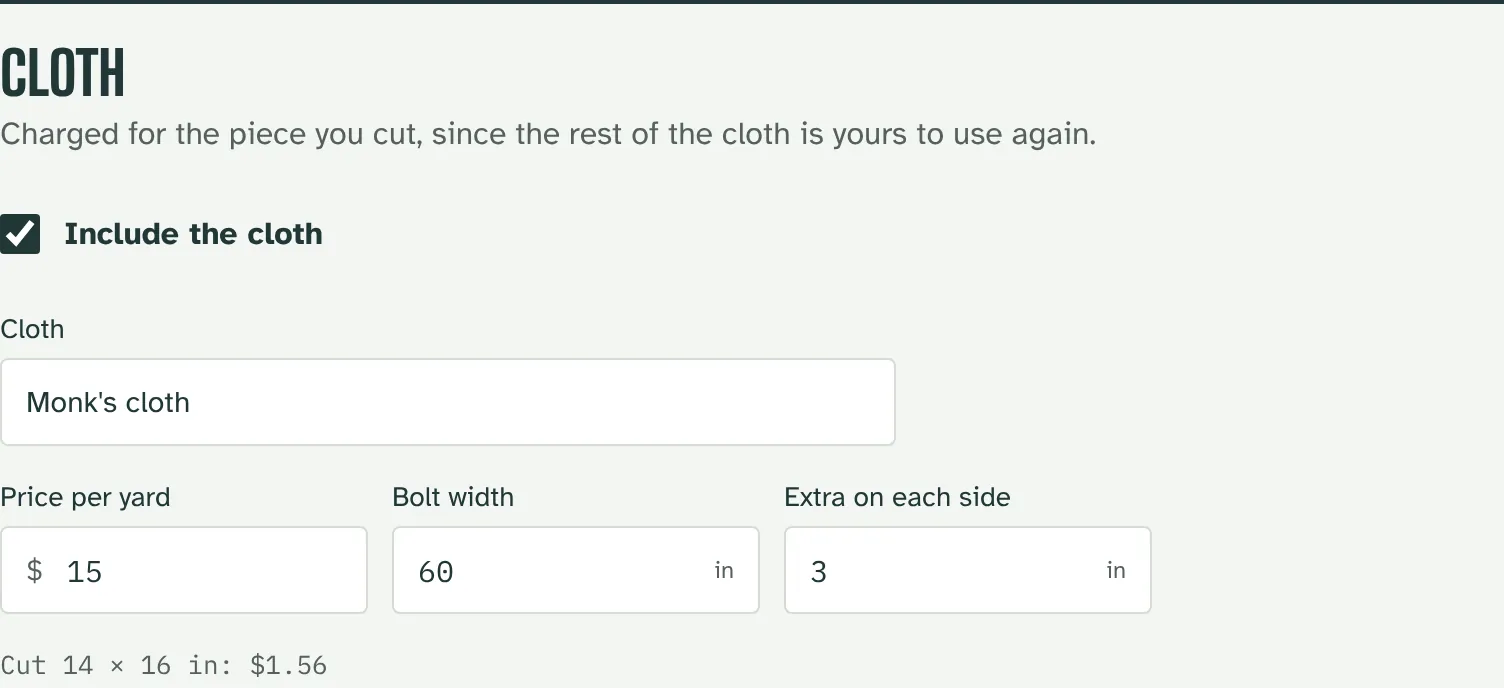
The design plus the extra on each side that your frame's grippers hold, 3 in to start. It charges for that piece of the cloth, not the whole yard, since the rest is yours to use again.
Quilting & sewing
Open the calculatorHow do I enter the fabric for a quilt top?
The best way is Yardage from my pattern: copy each fabric's yardage from the pattern. Fat quarters are 0.25 yd. No pattern? Choose Estimate from the size. It works out the top's area in 42 in quilting cotton, plus extra for seams and trimming, and your fabrics share it.
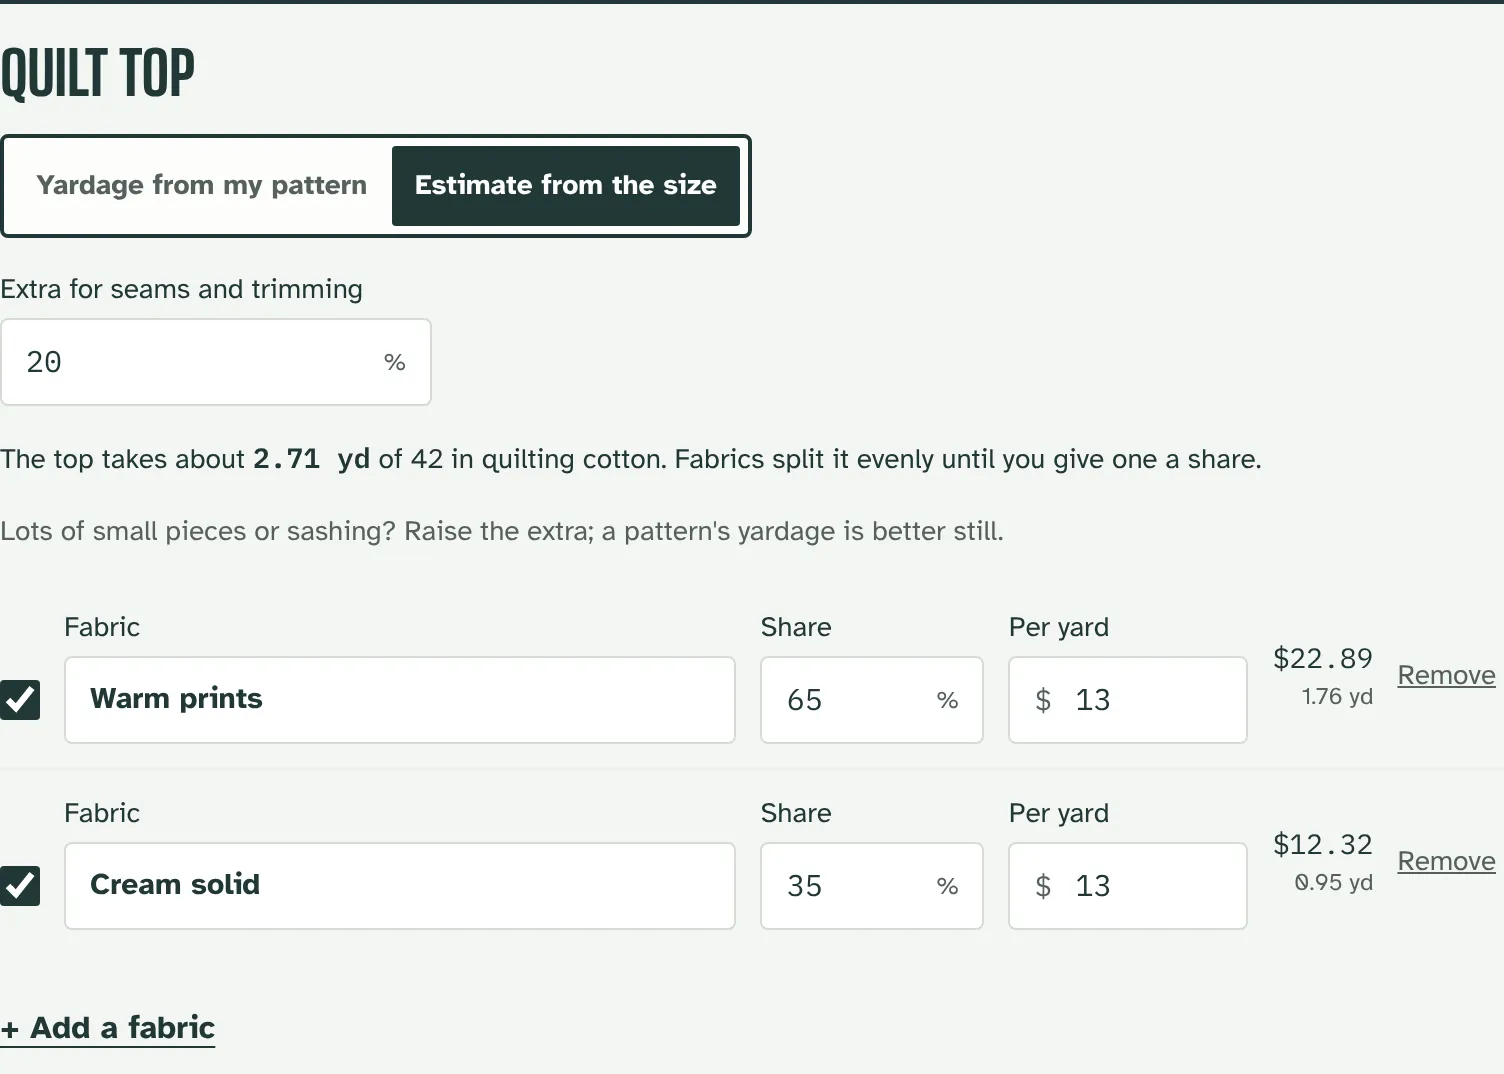
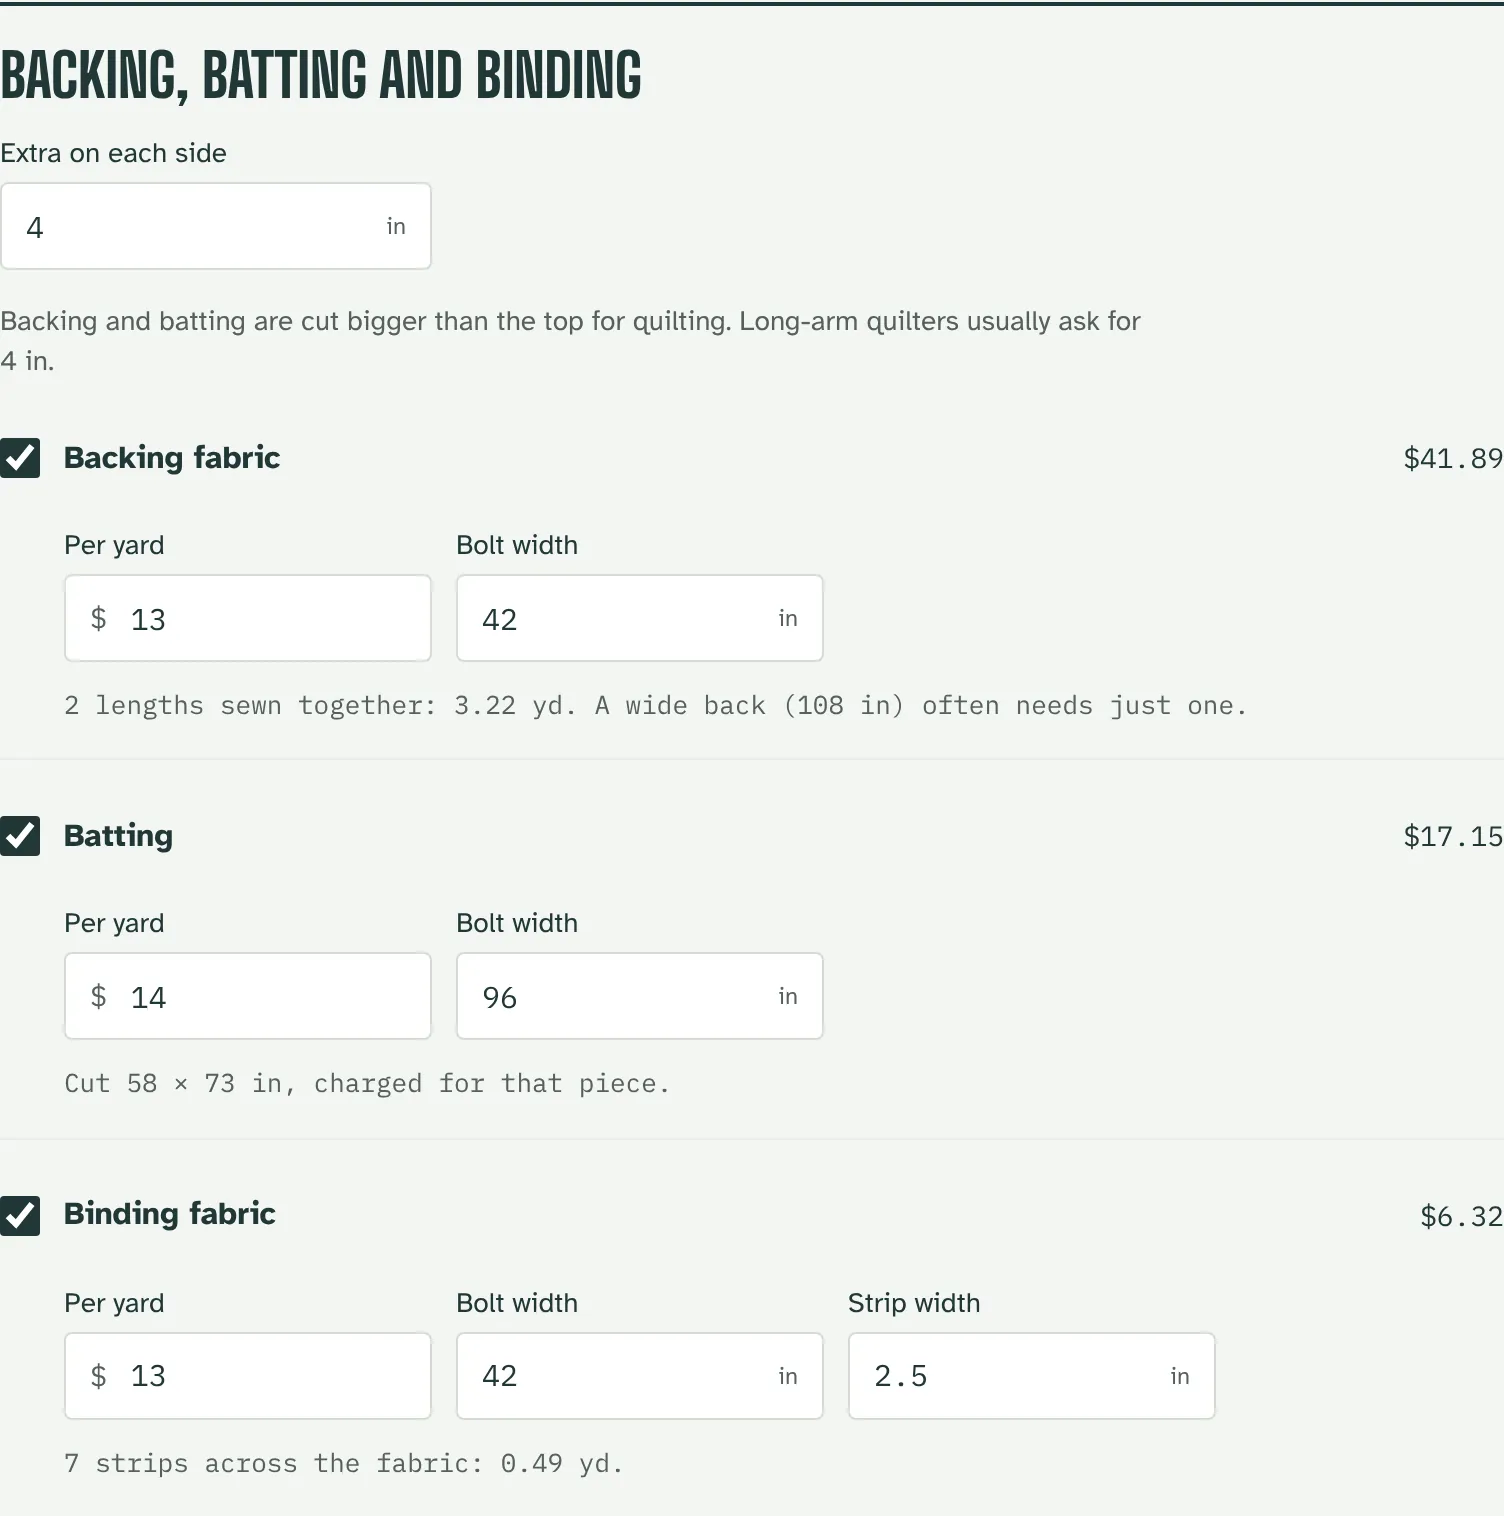
How does it work out the backing, batting and binding?
- Backing: the top plus the extra on every side, from as few lengths sewn together as fit, running whichever way takes less fabric. A wide back (108 in) often needs just one length.
- Batting: cut to the same size, charged for that piece of the roll.
- Binding: strips cut across the fabric, enough to go round the quilt with a little extra for joining them.
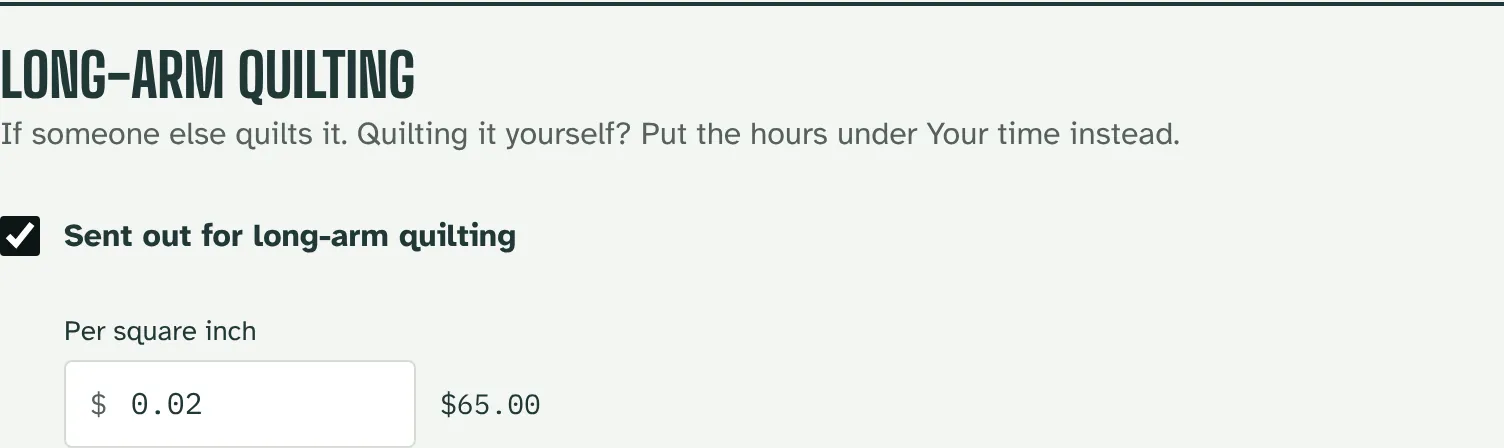
I send my quilts out for long-arm quilting. How do I add that?
Tick Sent out for long-arm quilting and enter your quilter's rate per square inch. It's charged on the top's area. If you quilt it yourself, leave it off and put the hours under Quilting instead.
Can I price bags, clothes or pillows?
Yes. Choose Something sewn, add each fabric with the yardage your pattern calls for (main, lining, contrast), tick the notions like a zipper, interfacing or buttons, and add your hours.
What rug materials should I factor into pricing?
Include all materials in your calculations:
- Yarn: Calculate by weight or length needed, plus 10% waste
- Backing fabric: Primary and secondary backing materials
- Binding: Tape, thread, or custom edge finishing materials
- Tools & supplies: Needles, scissors, cleaning supplies (per-project cost)
How should I estimate time for rug projects?
Break down your time into phases:
- Design & Planning: 1-3 hours depending on complexity
- Tufting: 2-4 hours per square foot (varies by stitch density)
- Carving/Sculpting: 30-60 minutes per square foot
- Binding: 2-4 hours depending on size and method
- Finishing: Washing, drying, final touches (2-4 hours)
How does it work out a price for each bar?
Like candles, you price the whole batch: your oils, lye, scent, colour and wrapping, how many bars you cut, and your hours. It shares the batch's cost across the bars you sell. Ends, trims and the bar you keep to test go under Ones that don't sell.
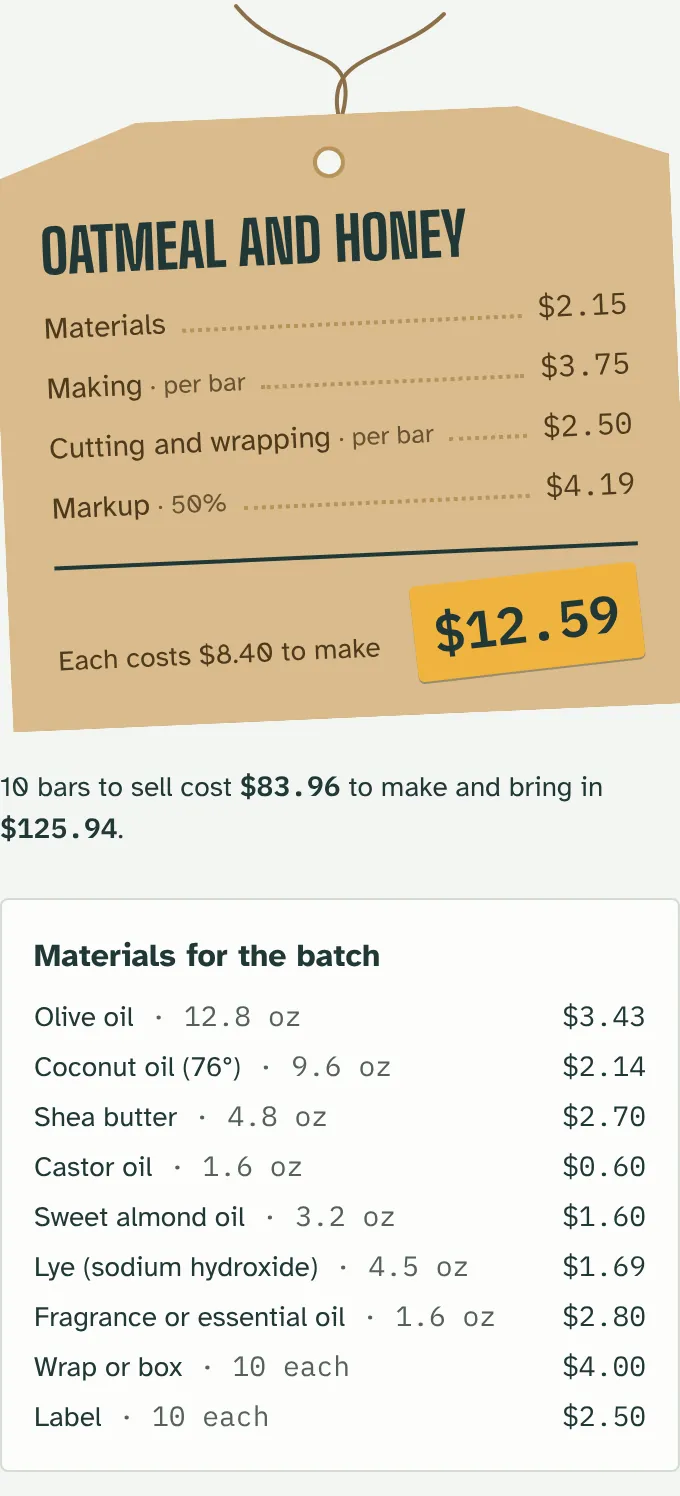
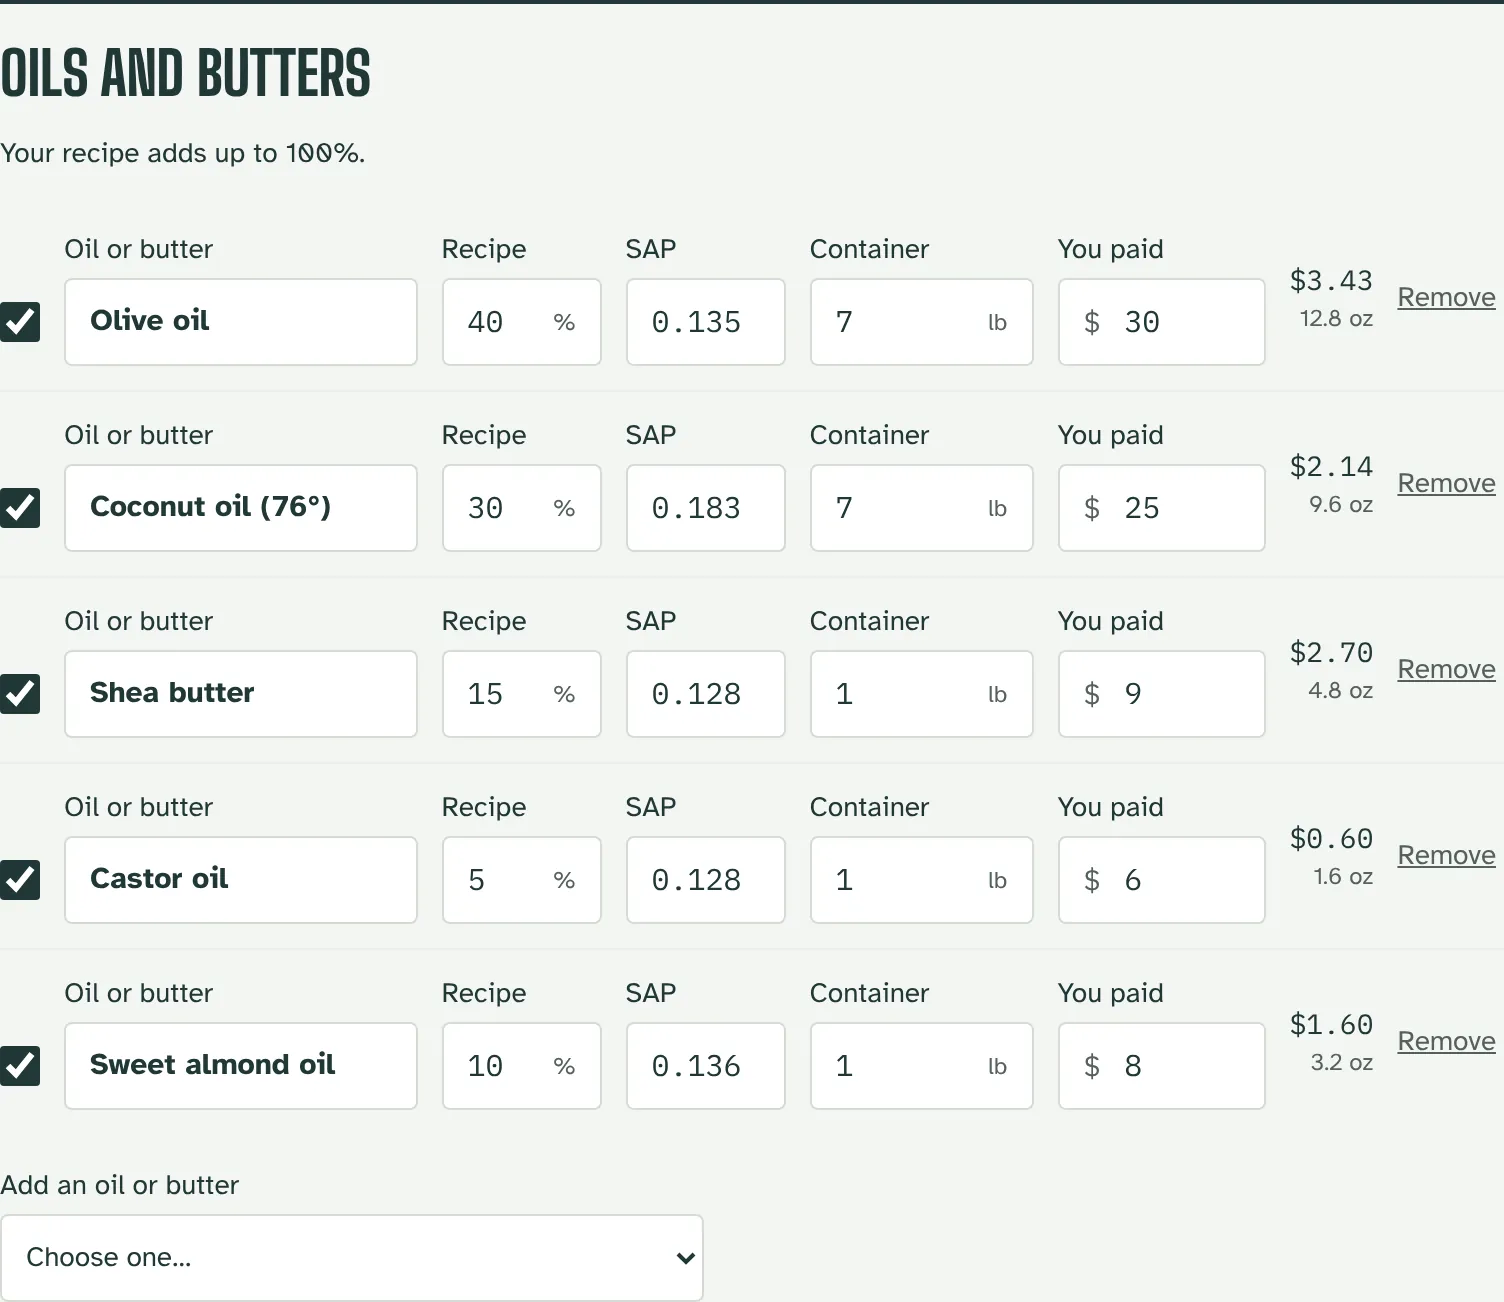
How do I enter my recipe's oils?
Enter the total weight of oils in the batch, then each oil's percent of the recipe and what its container cost. Add oils from the list, or choose Something else and type its SAP value. If the percents don't add up to 100%, it says so and scales them to fit. An oil at 0% uses none.
Can I use the lye figure for my recipe?
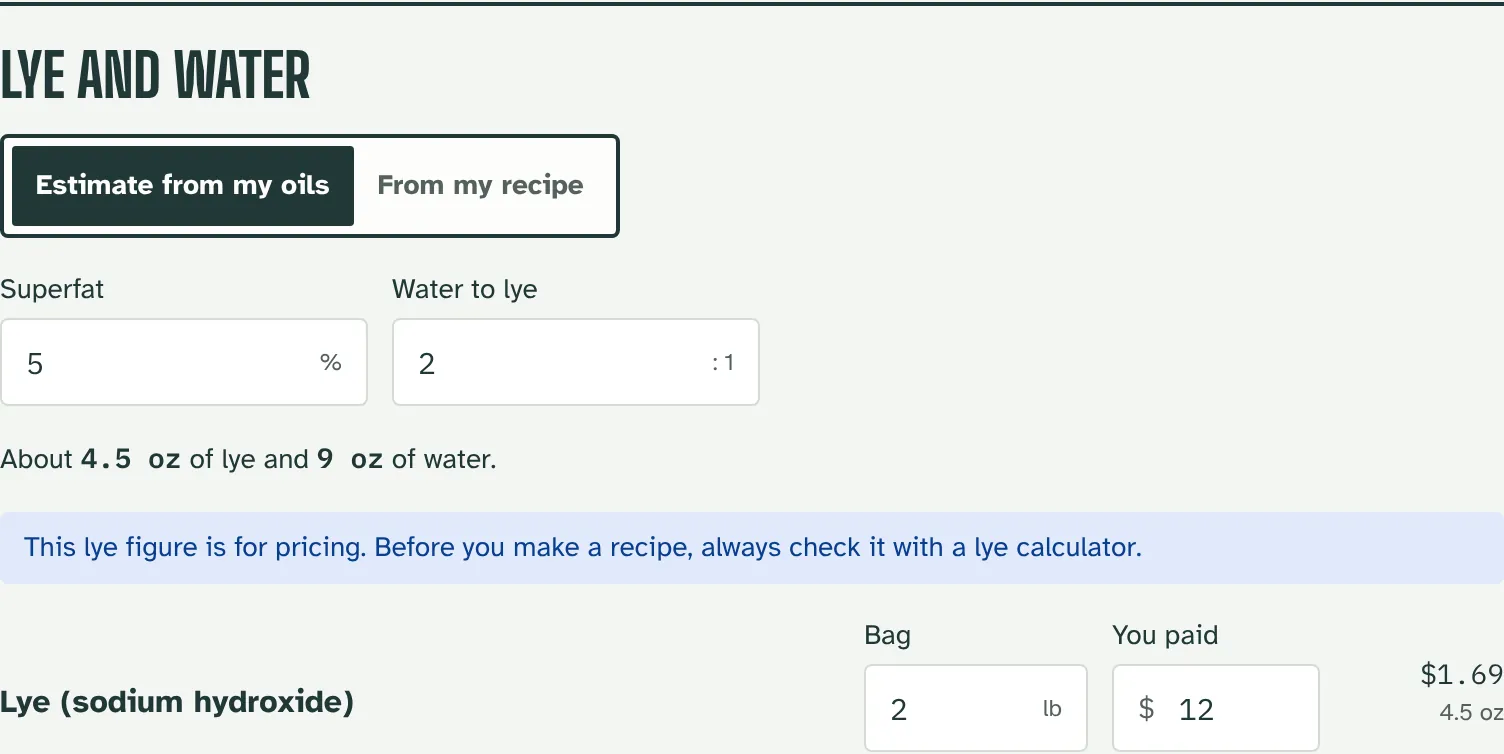
No: it's for pricing only. It's worked out from each oil's typical SAP value and your superfat, which is close enough to price the lye, but real oils vary. Before you make a recipe, always run it through a lye calculator. If you already have your recipe's lye weight, choose From my recipe and type it in.
What's the difference between extras and wrapping?
Colour, clay and botanicals cost once a batch. Wraps, boxes, labels and bands go on each bar you sell, so they're charged per bar. Add your own under either.
Does it count curing time?
No. Curing is waiting, not working, so only your making and cutting and wrapping hours are counted. If shelf space is tight, you can add a per batch extra for it.
Weaving & macramé
Open the calculatorHow does it work out the warp and weft?
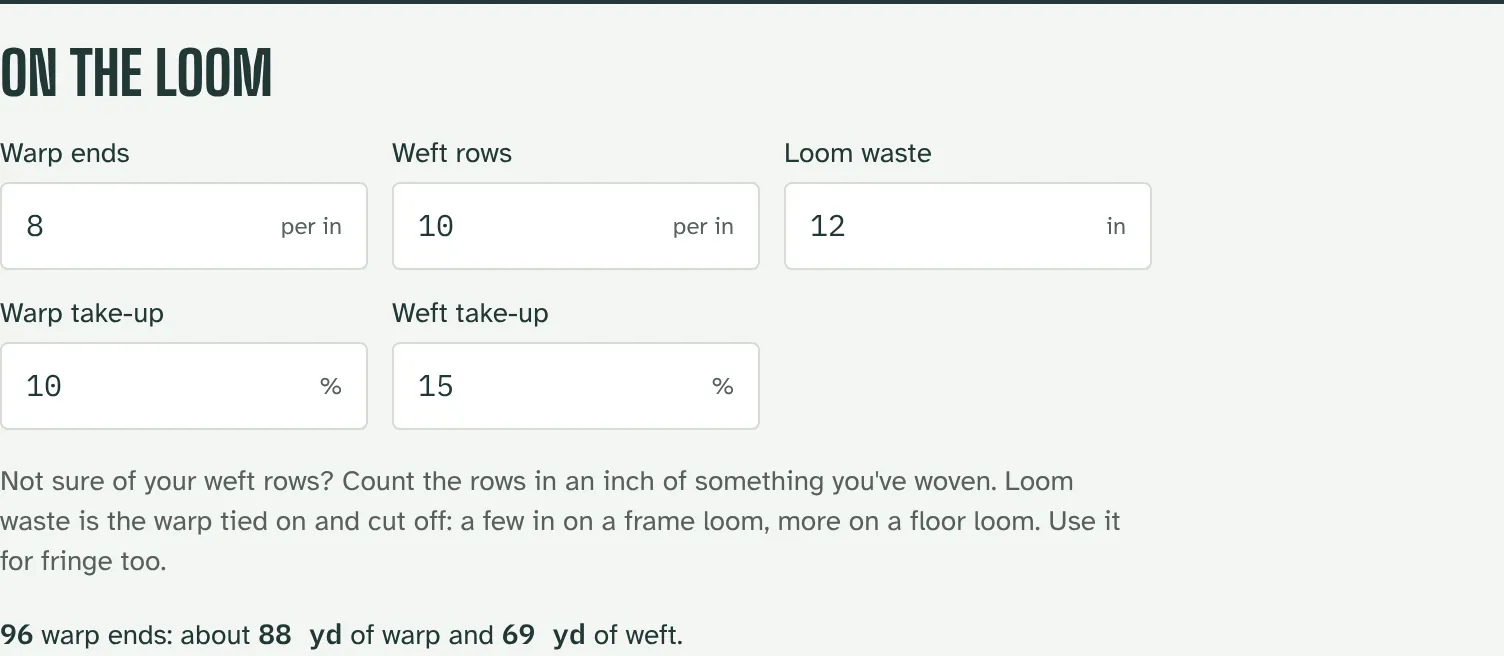
- Warp: the ends across the piece (its width times your ends per inch), each running the finished length plus loom waste, plus take-up for going over and under.
- Weft: the rows in the piece (its length times your rows per inch), each crossing the width, plus take-up.
I don't know my weft rows per inch.
Count the rows in an inch of something you've woven the same way. Beat firmly and it goes up; a loose, open weave has fewer. Tapestry weavers often pack far more rows than a table-loom weave.
I weave with lots of yarns. How is the weft split?
Add each yarn. They share the weft evenly until you give one a share. Each shows its yards and how many skeins to buy.
How long should I cut my macramé cords?
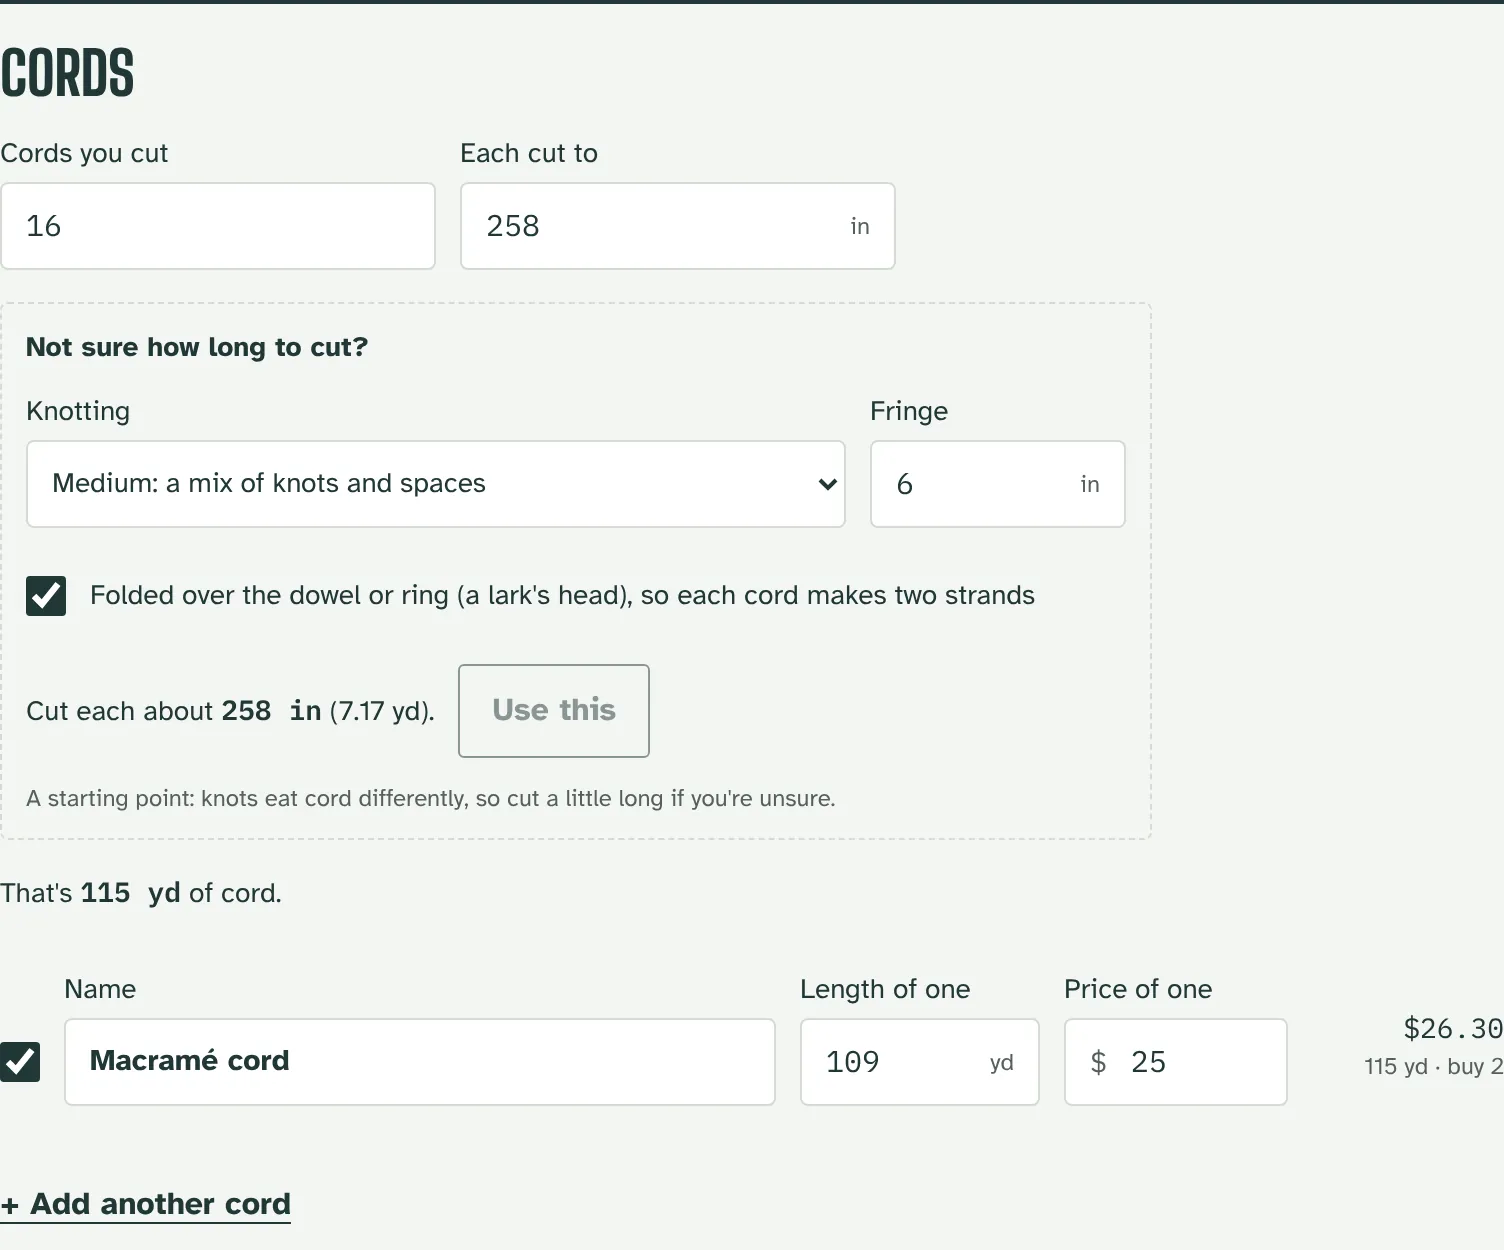
Use Not sure how long to cut? Pick how densely you knot, add the fringe, and tick if the cords fold over the dowel or ring. It suggests a length; tap Use this. It's a starting point, since knots eat cord differently, so cut a little long if you're unsure.
Still have questions?
Contact us